What are breadboard jumper wires?
Insulated electrical wires with connectors on both ends, often called “jump wires”, “jumper cables”, or “Dupont wires”, and their connectors conform to a specified pitch of 2.54 mm (0.1″) that works with breadboards, prototyping boards, and a variety of microcontroller headers. Jumpers are designed to quickly connect within a prototype without requiring soldering, allowing rapid prototyping and flexibility in circuit design.
Standard Breadboard Jumper Wire Connections
- Breadboard wires typically fall into one of three classes of standard connectors based on the connector genders. The three basic connector configurations are:
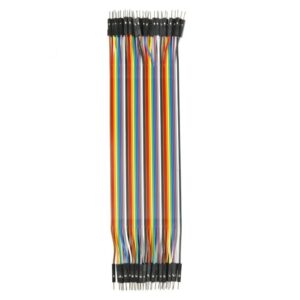
- Male to Male (M-M): Both ends have male pins. Connects rows of a breadboard, or bridges rows on a breadboard, and connects components to other components on connection-less boards.
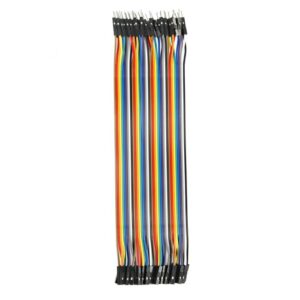
- Male to Female (M-F): One end has a male pin and the other a female socket. Connects male header on a microcontroller or module to the female socket on the breadboard, or connects a breadboard with a sensor or other module.
- Female to Female (F-F): Both ends have a female socket. Is useful for connecting two modules with male headers or connecting females where both ends of the wire require a female connector.
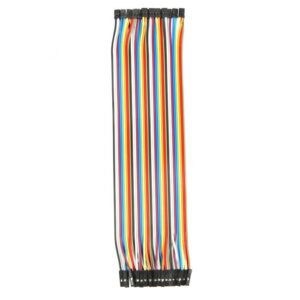
Decoratively packaged breadboard wires are usually in a brightly coloured ribbon configuration (octave sequence), typically having about 10 cm, 20 cm, and 30 cm lengths. Wires typically stay as a ribbon, but they may be easily separated and used individually, enabling the user to adapt to their circuit layout.
The Importance of Breadboard Jumper Wires when Prototyping for Electronics
Ability to Prototype without Soldering
Using jumper wires (or breadboard jumper wires) provides the most significant advantage of being able to build complete circuits without soldering any components together. Any electronics component you want to use (e.g., sensors, development boards, etc.) or any modules that provide functionality can easily connect through your solderless prototyping boards (i.e., breadboards) while providing quick, simple, and cost-effective ways of making these connections. Additionally, due to this capability of building electronic systems without needing solder or soldering tools, rapid prototyping can be done much quicker, allowing you to iterate, debug, change designs, etc.
Re-usability and Flexibility of Jumper Wire Connector Types
Since the jumper wire connector type is easily removable, you can build one prototype to assemble a circuit or system, then tear it down and use the jumper wire (or any portion of it) in another prototype, allowing for a lot of flexibility with your project designs. The standard pin spacing and insulated wire length of jumper wires also makes them perfect for hobbyists, beginner electronics students, and experienced makers alike.
Convenience and Compatibility
The majority of sensor modules and development boards have pin headers with standard (0.1″) spacing of 2.54mm between their centers. As a result, jumper wires, which are essentially wires used for making temporary connections, will work on multiple projects. Since jumper wires can be combined in a ribbon pattern (multiple wires inline) and plugged directly into a circuit, they provide a very convenient means of creating connections among multiple wires on one connector.
Quick Experimentation & Adjustments
Once you have the general layout of your project, you can easily make any necessary alterations or adjustments as you assemble it. As you begin experimenting with different layouts and/or designs, jumper wires provide an opportunity for extensive experimentation, rapid connection changes, as well as very fast iterations of designs by eliminating the need for soldering or desoldering new wires each time you want to make an adjustment. By simply unplugging a wire and plugging it into another area of the circuit, you can very quickly create the desired connection.
Important Considerations for Best Results
While breadboard jumper wires are highly practical, there are certain factors you should pay attention to ensure stable connections and reliable performance:
- Select the correct Connector Type – M-F, M-M, or F-F depending on the connection you are making. Using an incorrect connector type may create a poor connection or no connection at all.
- Plan Your Wiring’s Length and Layout – Long wires could get tangled or cause interference with other components. If you have many signals, you may want to use Multi-Wire Ribbon Assembly sets to allow for better organization of your signals, however, you can improve clarity and reduce the chance of shorting out your wires by re-routing and grouping your wires.
- Test Your Connection Firmness – Since these types of plugs rely on friction-fit into either breadboard sockets or Module Headers, be sure that they are inserted correctly and fit securely. Using loose, poor quality, wires will eventually cause your connections to become intermittent if you move them around.
- Be Aware of Your Wire Gauge and Quality – Most standard jumper wires have a thin stranded wire (typically 26-28 AWG). When building with higher current levels or as a durable build, you should probably use heavier gauge or solid core wires.
- Consider Soldered and/or Proper Headers for Permanent Builds – Although, jumper wire is great for prototyping and testing, for permanent or longer-lasting projects, soldered connections (or proper headers) generally give you the most reliable and durable results.
Who Uses Breadboard Jumper Wires — And When?
Breadboard jumper wires are a staple for:
- Hobbyists experiment with designing and building electronic circuits using microcontrollers, sensors, LED lights and circuit modules etc.
- Students/learners to build electrical projects while learning, experimentation into how they would wire together their entire circuit prototype along with checking the logic of their designed circuit through testing.
- Design Engineers and Developers to create prototype versions of their companies’ products and test them prior to committing to the design of assembled printed circuit boards(PCBs) or final prototypes and systems.
- Makers industry participants and people interested in making for themselves will enjoy thick and thin (flexibility) but also speed (iterations).
Given their ease of use, they are ideal for early-stage designs, experimentation, teaching, learning, and rapid prototyping — where changes and adjustments are expected.
Why Choose Dupont / Arduino-Compatible Breadboard Jumper Wires
- Opting for standard Dupont-style jumper wires allow for compatibility, and ease of use. The jumper wires use the 2.54 mm spacing and a variety of connector configurations (M-M, M-F, F-F) which allow you to:
- Work with breadboards, Arduino-like boards and other dev. boards, sensors, and breakout boards seamlessly.
- Use the jumper wires any way you need to, like linking rows on a breadboard, connecting modules to boards, or chaining several components together.
- Use the jumper wires again and again easily; the solderless connectors are ideal for testing, experimenting, and making faster designs.
- Enjoy the simple and plug-and-play way of putting them together, regardless if you are a beginner or an advanced professional.
Conclusion
Breadboard jumper wires are a critical element in the toolbox of breadboards and development boards and modular electronics (i.e., prototyping boards). They have no soldering required, so they are easy to use. They come in a variety of arrangements (M – M; M – F; F – F), and because of this you can use them with standard 2.54mm headers. Dupont-style cables are a very quick, easy way to connect your devices and reuse your connections as well. They will work well for Arduino projects, sensor arrays, learning about electronics or developing early prototypes.
When you connect anything from LEDs, sensors, microcontrollers, or modules jumper wires provide you with the convenience and flexibility to make your solder-less circuits quickly and easily.